Monday, February 28, 2011
Sunday, February 27, 2011
I like Mod Podge too
So this site looks really good to me :)
This is a Great Place to Start.
Are you a beginning Mod Podger? Are you having Mod Podge issues that you feel you may never recover from? Then you should watch these videos. There are many more to come (lucky you, right?)
Saturday, February 26, 2011
Learn the Ancient Papermaking Craft | Home Made Simple
I always wanted to make paper for crafting.
I would like to do this for one of my Fair projects.
I have a lot of dried flowers from last Summer and I think they would make a nice addition to the paper.
I found some helpful bogs and links one the subject.
So soon I will get this project going. It looks like I have everything I need , but the frame.
My husband should be able to make one for me.
Good luck to me and soon I will be posting my own pics.
Here is one of the links with nice clear information.
Learn the Ancient Papermaking Craft | Home Made Simple: "Mould and deckle
Assortment of paper (computer paper, construction paper, colored paper, etc.)
Water
Blender
 Plastic tub (must be larger than mould and deckle)
Sponge
Cloth
Liquid starch (optional)
I"
I would like to do this for one of my Fair projects.
I have a lot of dried flowers from last Summer and I think they would make a nice addition to the paper.
I found some helpful bogs and links one the subject.
So soon I will get this project going. It looks like I have everything I need , but the frame.
My husband should be able to make one for me.
Good luck to me and soon I will be posting my own pics.
Here is one of the links with nice clear information.
Learn the Ancient Papermaking Craft | Home Made Simple: "Mould and deckle
Assortment of paper (computer paper, construction paper, colored paper, etc.)
Water
Blender

Sponge
Cloth
Liquid starch (optional)
I"
thefrugalcraftyrushdlady: Handmade Paper from Used Christmas Wrap

This sounds good not only Christmas wrap, but Birthday and other special gift giving occasions.
thefrugalcraftyrushdlady: Handmade Paper from Used Christmas Wrap: "
To decorate: Try spritzing dried paper with inks and cut paper into shapes with a die-cutter to use as Christmas ornaments or gift tags. Punch a hole in one end and thread a strand of ribbon, gold cording or embroidery floss to paper as a hanger or tie. Or use embossed handmade paper on cards!"
Homemade Paper « Life Off The Grid
Great images, suggestions, and super site full of green living.
Nice good from (Off the Grid)
Homemade Paper « Life Off The Grid


Nice good from (Off the Grid)
Homemade Paper « Life Off The Grid
Homemade Paper from more than a Average Joe
Great tips for making homemade paper and much much more.
All kids of good stuff, like green living tips, reports, studies, and fun garden advice.
Homemade Paper – Ultimate Paper Recycling | Green Thinking for the Average Joe
All kids of good stuff, like green living tips, reports, studies, and fun garden advice.
Homemade Paper – Ultimate Paper Recycling | Green Thinking for the Average Joe
Blend the mess out of that paper, starting with short burts, and finishing with a 20-second blend that purees the paper into a pulpy soup.

Do this about three times, each time pouring the blended paper soup into a basin or tote.

Do this about three times, each time pouring the blended paper soup into a basin or tote.
Afterward, put in some more warm water, filling the basin about halfway. Add about two tablespoons of corn starch, too.
Stir the pulp around, then dip your wood frame into the pulp all the way to the bottom. Slowly raise it up, keeping it level. Your screen should be covered with pulp now.
Read more on this
Read more on this
A Spring time Craft too
A great Valentine's day project from...
Cupcake Liner Gift Topper ~ Be Different...Act Normal
But I was too late finding this jewel :(
However I think it would also work for a Spring time and/or Easter craft too!
I especially like the link for Cupcake liners sucker flowers? Valentine's treat.
I want to do this for Easter and I think I can get away with using all that left over tootise pops I bought for Valentine's day for Easter !!!
Click here for moreClick here for more
Friday, February 25, 2011
Proud to say.... Dollar Store Crafts are OK
Here you can find a lot, and get great ideals that you can expand on like this...
Cheap Easy Craft Ideas, Tutorials, Free Crafts - Dollar Store Crafts
Cheap Easy Craft Ideas, Tutorials, Free Crafts - Dollar Store Crafts
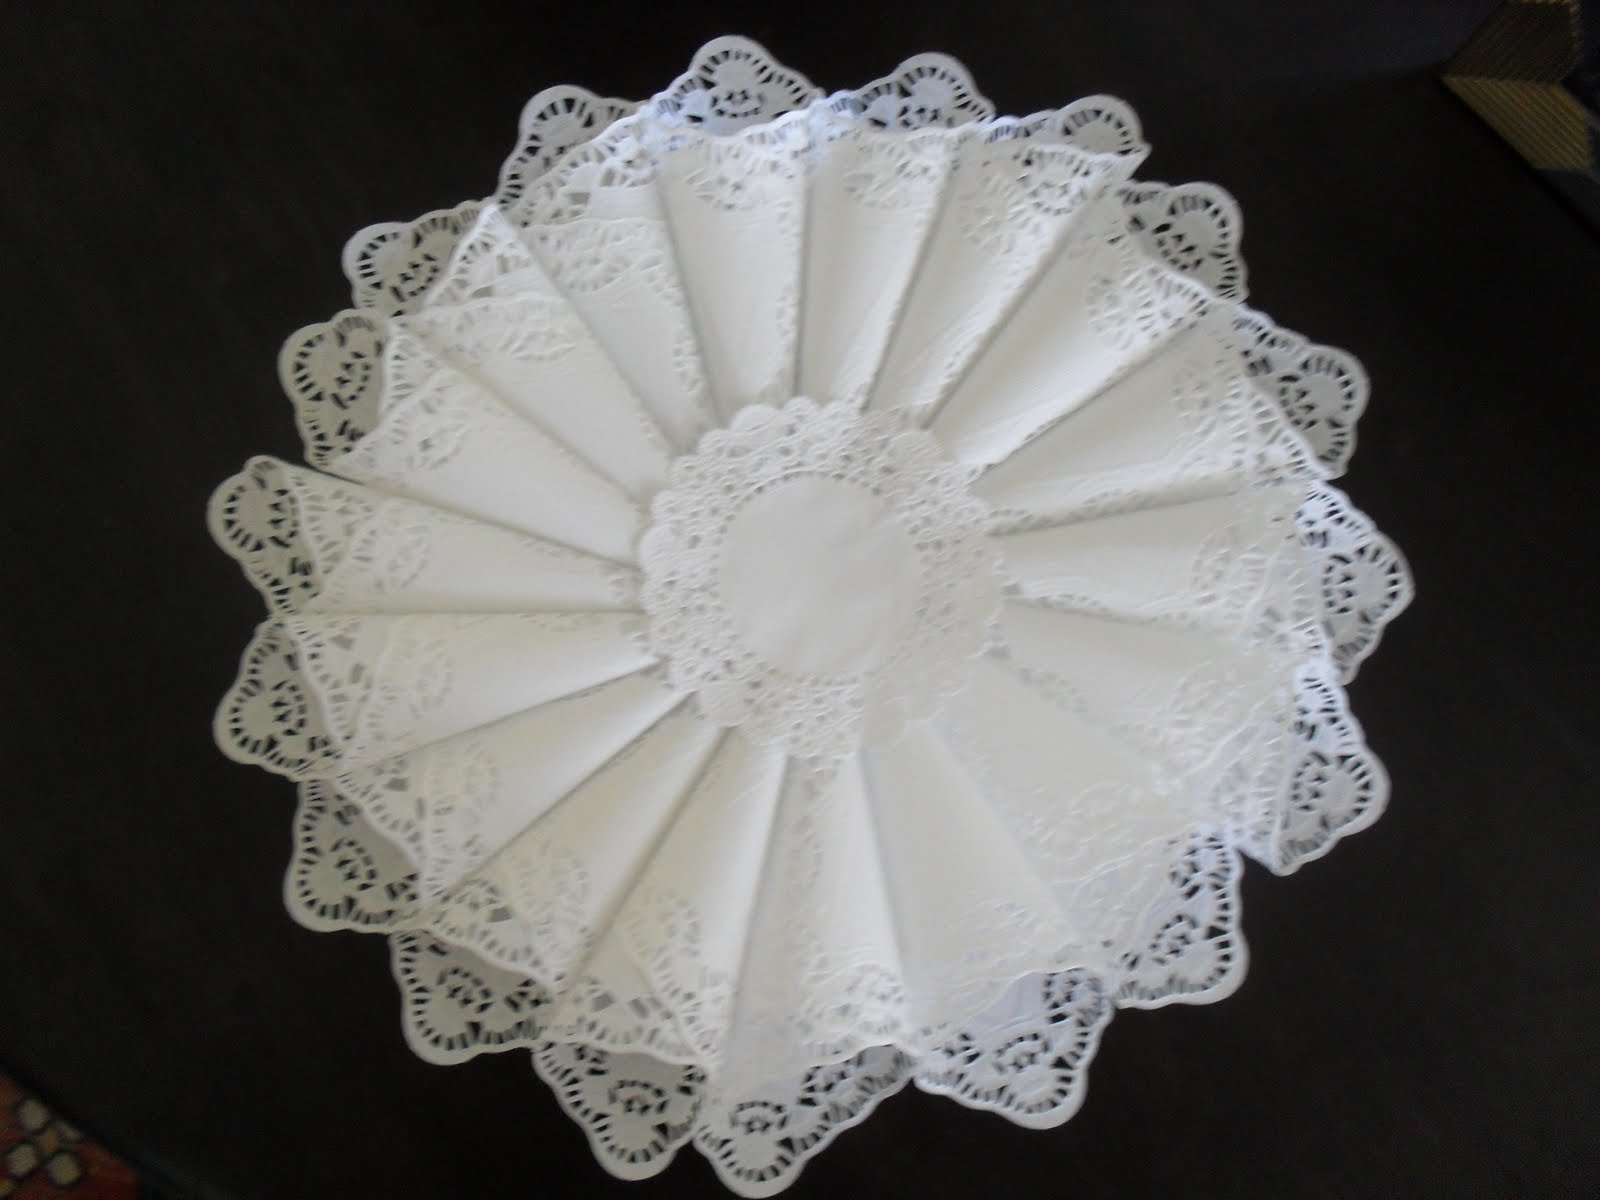
Make a Paper Doily Cone Wreath
3 MAY 2010 4,652 VIEWS 3 COMMENTS
by heather
I love this twist on the paper cone wreath! Reader Susan at Under the Willow made it with paper doilies from the dollar store. It's so pretty, and nobody would guess it cost about a dollar to make! These would be great wedding or shower decorations, or would look stunning against a dark-colored wall (or any wall, really!) Susan doesn't have a tutorial, but Martha Stewart to the rescue: Cone Wreath. [click here to see Susan's wreath]
I think this is great, and I might be able to tweak it for St Patrick's day :)
Blogging Resources from CrafterMinds
This site has much to offer and can help direct Bloggers/Crafters
Here is there intro:
Blogging Resources | CrafterMinds
Here is there intro:
The mission of Crafterminds, LLC is to connect lifestyle bloggers and
their loyal audiences to marketers that focus on DIY, handmade, and
arts & crafts markets.
their loyal audiences to marketers that focus on DIY, handmade, and
arts & crafts markets.
Crafterminds is a super group of these expert craft bloggers:
- Amy Anderson, Mod Podge Rocks
- Beckie Farrant, Infarrantly Creative
- Jennifer Hadfield, Tatertots and Jello
- Heather Mann, Dollar Store Crafts
Blogging Resources | CrafterMinds
Willow Wreath
To begin, take one branch and form a circle, starting with the thicker end of the branch. Wrap the thinner end of the branch (the end with all the little branches hanging off the main branch) around the thicker end of the branch; continue wrapping around and around until you run out of branch.


Thursday, February 24, 2011
Vintage Sewing Patterns
I was lost for at least an hour viewing all the great patterns from the forties to the hip sixties and much more.
Have a look at this site...............

Vintage 40s 50s 60s 70s Sewing Pattern Patterns Dress Gown Slip Retro Clothing Swing Rockabilly Mod Hippie Fashions Costumes - Shop for Vintage Sewing Patterns at MOMSPatterns!
Have a look at this site...............
Vintage 40s 50s 60s 70s Sewing Pattern Patterns Dress Gown Slip Retro Clothing Swing Rockabilly Mod Hippie Fashions Costumes - Shop for Vintage Sewing Patterns at MOMSPatterns!


It's nice to know there are possibilities
Craft storage and much more from Ikea and others.
My new motto how to make it work...
Storage, small square footage, and all on a budget...
Look at Ikea storage
Sauder Furniture


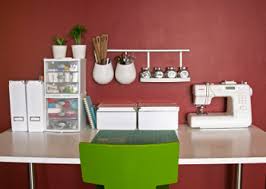


Craft storage and much more from Ikea and others.
My new motto how to make it work...
Storage, small square footage, and all on a budget...
Look at Ikea storage
Sauder Furniture
Tank top totes – six pockets or gathered - Crafty Nest
Tank top totes – six pockets or gathered - Crafty Nest


How to make a tank top tote with six pockets
Supplies and tools
- tank top
- straight pins
- water-erasable fabric marker
- sewing machine and thread
- fabric scissors
- seam ripper
- sewing gauge or ruler

1. First remove the tags with a seam ripper or scissors.

2. Turn the tank top inside out.

3. If your tank top has a bra liner, cut the elastic off the bottom of it.

4. Fold so that the straps lie on top of each other.

5. Fold the bottom of the tank over itself. This will become the pockets.

6. Pin in place, making sure the seams line up. Mark where you want the seams in between each pocket with pins or an erasable fabric marker.

7. Using a stitch that stretches with knit fabric, such as the triple straight stitch, sew the seams that divide each pocket. Make sure the bra liner is lying flat before sewing. Back-stitch to lock the seams.

8. Sew the bottom together about 1/4 inch from the edge. Back-stitch to lock the seam.
Wednesday, February 23, 2011
Big Shot Die Cutting System – Let’s Learn « Stampaloooza Studios
Big Shot Die Cutting System – Let’s Learn « Stampaloooza Studios
Very helpful information from: Stampalooza Studios
Very helpful information from: Stampalooza Studios
Stampin’ Up! is proud to offer the Big Shot Die Cutting System! A Big Shot is a personal die cutting machine. It works on a rolling principle. The materials to be cut are rolled through the machine as you turn a crank. The Big Shot machine is capable of cutting materials from vellum to chipboard (with the appropriate dies), embossing, and texturizing. For those of you who do not know what this is … just think about heaven a bit… you can cut shapes, letters, phrases and images using this cute tool as well as emboss using special embossing folders and dies… The Sizzix Big Shot for Stampin’ Up! product line is a big deal! With the Big Shot you can cut over 50 different material types and duplicate creative and intricate designs quickly and easily. Using the special Multipurpose Platform – It also works with the following competitor dies and embossing folders (low profile/wafer thin dies as well as acid edged dies):
- Sizzix – Sizzix Steel Rule Dies, Sizzlets, BigZ Dies, Clearlets , Embosslets, Simple Impressions Folders, Texurz, Easy Emboss, Cutn’Emboss, Window Cuts, Decorative Strips, Extended Cuts
- Big Shot Thick Cut Dies, Big Shot Thin Cut Dies
- Spellbinders – Wizard Dies and embossing folders
- Cuddlebug – Dies, A2 Embossing Folders, Embossing Folders
- Quickutz
- Bosscut
- Accucut – Thinner wooden and wafer then dies
- Stampin’ Up! Brass Templates!
- Any Competitor’s Brass Templates!
Stampin’ Up! has created a special cutting dies that you will NOT find anywhere else that will enhance your Stampin’ Adventures and help you turn out beautiful cards, scrapbook pages and gifts with ease!
As you get more familiar with the Sizzix Big Shot Die Cutting System, you will begin to notice that there are different styles offered – the black/gray Stampin’ Up! Style… the black/pink Special Edition Style… and the Blue Style… these are all the same – they just are different colors… The Big Kick is not the same as the Big Shot.
There’s a few terms that you need to know about to help you get started:
- Die – A special metal plate that has the image that you desire to cut or emboss onto the cardstock (or one of the 50 approved materials). The dies can be Steel Rule or Acid Edge Dies.
- Sandwich – A unique combination of die cutter materials plus the Die or Embossing Folder plus the material you are trying to emboss or cut. (In this case, sandwich refers to the way you stack the different plates for your die-cutting machine.)
- Embossing Folder – A special folder that has the positive and negative image to emboss onto your material.
- Shim – Material such as Cereal Boxes, heavier cardstock or special Shims to make the sandwich stronger and more sturdy – usually used for embossing…
- Multipurpose Platform – a special base (bottom of sandwhich) that allows you to work with other competitor’s dies. This comes with the Stampin’ Up! Big Shot.
- Extender Platform – a special base that allows you to use longer dies with.
- Embossing Starter Kit – a special base that has a rubber mat to help make the impression when using embossing templates and folders.
Stampin’ Up! Product Codes:
- 114337 Chocolate Chip Vinyl Sheet, 12″x24″, $12.95 for 2 sheets.
- 114336 Kraft Vinyl Sheet, 12″x24″, $12.95 for 2 sheets.
- 114335 White Vinyl Sheet, 12″x24″, $12.95 for 2 sheets.
- 114334 Gray Vinyl Sheet, 12″x24″, $12.95 for 2 sheets.
Directions:
The directions will be different for each type of die/embossing folder you use. But the steps are pretty simple:
The directions will be different for each type of die/embossing folder you use. But the steps are pretty simple:
- Step 1: Make a sandwich using the material you want to cut/emboss and die/embossing folder and base of your choice.
- Step 2: Place the sandwich at the front of the Big Shot Die Cutting Matchine.
- Step 3: Using the handle, crank until the sandwich comes out on the other side. Embossing will be an easier crank than cutting. Cutting will cause you to hear noises that are popping – which means you are cutting through the material.
- Step 4: Take apart the sandwich and enjoy your new creation!
Here’s a few websites that will help you get familiar with the Big Shot and what it can do…
- Big Shot Basics (Must Read!)
Here’s a few ideas that are really cute:
- 5 Point (3D) Star Tutorial (notice how nicked up the acrylic pad is from cutting… don’t worry it’s normal!)
- Birthday Party Mask Tutorial (using the pennant die from Stampin’ Up!)
Here’s a few sandwich tutorials that will help you with sandwiching the dies properly:
- Photo Tutorial Baskets & Blooms Die* by Diana Gibbs
- Video tutorial Baskets & Blooms Die* by Angie Kennedy Juda* If you use Cardstock for the “bottom” of your basket it would be more sturdy
*Cut your DSP to 8 x 5 1/4
*Cut your Cardstock to 2 3/4 x 2 3/4
Fiskars Plastic Texture Plates Sandwich:
1. Big Shot Multi-Purpose Platform (Tab 2)
2. Fiskars Embossing Template
3. Paper/Cardstock
4. Sizzix Embossing Mat (or the like)
5. Acrylic Pad
2. Fiskars Embossing Template
3. Paper/Cardstock
4. Sizzix Embossing Mat (or the like)
5. Acrylic Pad
Tips for using the Big Shot:
- When using cutting dies that have folds in them, use the crease pad instead of the cutting pad. If you do not, then you increase the risk of getting cuts where the folds should be.
- If it seems hard to crank the wheel, flip the top cutting plate over and see if that makes a difference.
- To prolong the life of the cutting pads, alternate & flip the cutting pads from time to time.
- Remember the Thin dies do not cut through thick materials like the Thick dies do… so make sure you read the instructions/recommended materials for the Thin Dies before you use them.
- Be careful using sandpaper on the cutting dies – it could dull the sharp edges and eventually wear out the ties.
- Put adhesive on the material you are trying to cut before you run it through the machine. It should not gum up the machine – this makes it easier then to have adhesive on the smaller letters and edges.
- Do not try to “stuff” too much in the sandwich – meaning really get to understand each type of material you are cutting on only put in what could be possible to cut. For example if you are using thick chipboard – try only one sheet instead of multiple sheets…
- When unpacking your Big Shot from Stampin’ Up! – be very careful not to loose your handle – it is embedded in one of the styrofoam packaging pieces – so do not throw anything away until you have your handle and the tools to attach the handle to the Big Shot machine…
- Use one plate for Cutting and one plate for Embossing and using a marker – mark them as such so that you do not have cuts in the plate you are using to emboss with…
- When embossing using embossing plates – mist your paper with a fine mist of water before embossing – this will weaken the paper fibers a little and make a deeper impression – especially when using the Fiskars plastic texture plates (blue/pink).
- Remember that each machine may be callibrated slightly different from the next. So experiment with your machine… and again do not force product through the rollers. Once you have found the “sandwich” formula write it down and attach it some place on your machine so that you won’t need to experiment the next time around.
- When precision is necessary, use Tombow Temporary Adhesive to position your cardstock/material you want to cut on the top of the sandwich… this will reduce the movement…
Saturday, February 19, 2011
Designing My Blog
Been looking, working, and thinking of just the right style!
Still haven't found it...
But I know it's out there...
Still haven't found it...
But I know it's out there...
Friday, February 18, 2011
Thursday, February 17, 2011
Wednesday, February 16, 2011
Sunday, February 13, 2011
Friday, February 11, 2011
Thursday, February 10, 2011
Lots of Crafting Going on
Not much posting or house cleaning (LOL)
If I'm not playing at the beach with Maggie an beach combing for crafting...
I'm crafting, biking or hiking...
I think I need to get things in order (LOL)
If I'm not playing at the beach with Maggie an beach combing for crafting...
I'm crafting, biking or hiking...
I think I need to get things in order (LOL)
Wednesday, February 9, 2011
Tuesday, February 8, 2011
Friday, February 4, 2011
Thursday, February 3, 2011
Wednesday, February 2, 2011
Sweet Tissue Paper Pom Poms
Thanks go out to the Martha Stewart Site for the great How To
Introduction

Read more at Wholeliving.com: Tissue Paper Pom-Poms How-To - Martha Stewart Crafts
Step 1
Stack eight 20-by-30-inch sheets of tissue. Make 1 1/2-inch-wide accordion folds, creasing with each fold.
Read more at Wholeliving.com: Tissue Paper Pom-Poms How-To - Martha Stewart Crafts

Step 2
Fold an 18-inch piece of floral wire in half, and slip over center of folded tissue; twist. With scissors, trim ends of tissue into rounded or pointy shapes.

Read more at Wholeliving.com: Tissue Paper Pom-Poms How-To - Martha Stewart Crafts
Step 3
Separate layers, pulling away from center one at a time.

Read more at Wholeliving.com: Tissue Paper Pom-Poms How-To - Martha Stewart Crafts
Step 4
Bend wire into a loop to fit around napkin, and twist end around loop to secure.

Read more at Wholeliving.com: Tissue Paper Pom-Poms How-To - Martha Stewart Crafts
Introduction
These dahlialike pom-poms appear to float in the air; in reality, they are hung from the ceiling with monofilament, imparting a cheerful radiance to any party.
You can also buy a Tissue Paper Pom-Pom Kit from Martha Stewart Crafts.
Read more at Wholeliving.com: Tissue Paper Pom-Poms How-To - Martha Stewart Crafts
Step 1
Stack eight 20-by-30-inch sheets of tissue. Make 1 1/2-inch-wide accordion folds, creasing with each fold.
Read more at Wholeliving.com: Tissue Paper Pom-Poms How-To - Martha Stewart Crafts
Step 2
Fold an 18-inch piece of floral wire in half, and slip over center of folded tissue; twist. With scissors, trim ends of tissue into rounded or pointy shapes.
Read more at Wholeliving.com: Tissue Paper Pom-Poms How-To - Martha Stewart Crafts
Step 3
Separate layers, pulling away from center one at a time.
Read more at Wholeliving.com: Tissue Paper Pom-Poms How-To - Martha Stewart Crafts
Step 4
Bend wire into a loop to fit around napkin, and twist end around loop to secure.
Read more at Wholeliving.com: Tissue Paper Pom-Poms How-To - Martha Stewart Crafts
Tuesday, February 1, 2011
Subscribe to:
Posts (Atom)