
Tuesday, May 31, 2011
Fourth of July Crafts for Klutzes - Associated Content from Yahoo! - associatedcontent.com
Fourth of July Crafts for Klutzes - Associated Content from Yahoo! - associatedcontent.com: "Make a cute patriotic box. First, find a box with a separate lid such as an ice cream box. Using a small paintbrush, paint the entire box and lid white with acrylic paint. Set the lid to the side. When the white paint dries, dip a large scruffy brush in red paint and wipe off most of the paint with a paper towel. Paint the box red; it should look streaky. Now repeat using the blue paint on the lid. When the box and lid are dry, dip three rubber stamps which spell out 'USA' into white paint and stamp them on the box. Use white paint and a star stamp on the lid. Again when everything dries, seal the box with spray matte acrylic. It's just that easy. And of course, you can use other stamps if you so desire."
Friday, May 20, 2011
seaglass earings
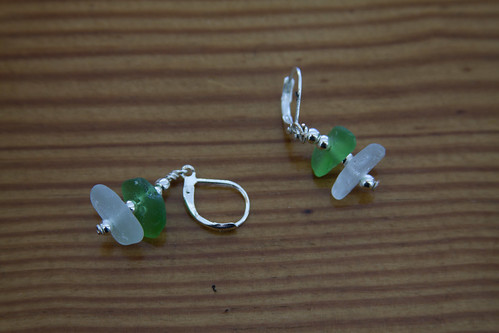 Not sure how to do this, but it's another cool goal. I love
sea-glass, and have been making faux sea-glass also.


Monday, May 16, 2011
mushrooms
 First find some large screws and paint them . Next, find a fallen tree branch, thick enough to hold the mushrooms
I plan on also adding moss...
Child Arts and Crafts Idea: MUSHROOM
You'll need:


 "
"
- egg-box (a cup and a peak)
- all purpose adhesive
- red and white acrylic paint
- a stick
- scissors
"Sunday, May 1, 2011
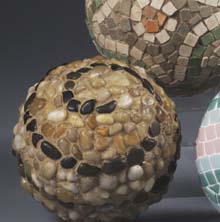
Pebbled Garden Decoration | FaveCrafts.com
Pebbled Garden Decoration | FaveCrafts.com: "Materials:
STYROFOAM™ Brand Foam:
Ball, 5'
Small, river-washed pebbles (available by the bag in craft stores)
Latex adhesive for ceramic tile
Sanded tile grout
Acrylic exterior satin varnish
Black fine line permanent marker
Ruler
Palette knife
Disposable bowl, small
Bucket of water
Household sponge
Soft, clean rag
Rubber gloves"
Steps:
- Sort pebbles into dark and light piles.
- Use marker to draw spiral around foam ball, from top to bottom, or draw custom pattern.
- Use palette knife to spread 1/8"-thick layer of tile adhesive onto small area of ball, along marker line. Note: Rest ball in small bowl while working to prevent rolling.
- Firmly press one or two rows of black pebbles into adhesive along entire marker line, placing pebbles close together; add adhesive as needed. Repeat, filling remaining spaces with light-colored pebbles for contrast; let dry completely.
- Following manufacturer's instructions, mix grout. Put on rubber gloves. Use tip of damp sponge to rub grout into spaces between stones. As you work, remove excess grout from stones with clean side of sponge. Note: If using sanded grout, rinse tools in bucket, not sink; discard water outdoors.
- When ball is completely grouted, wipe away excess once more using damp sponge. Let ball dry slightly. Repeat sponging until stones are clean.
- When dry, rub ball with clean rag to remove grout residue and restore shine.
- If using outdoors, follow manufacturer's instructions to apply one or more coats of sealer to ball.
®™ Trademark of The Dow Chemical Company ("Dow") or an affiliated company of Dow.
For more project ideas, please see styrofoamstyle.com.
For more project ideas, please see styrofoamstyle.com.
Subscribe to:
Posts (Atom)